Effective Pipe Repair Methods for Leaking Issues
In your home, dealing with leaking pipes can lead to water damage, increased utility bills, and even mold problems if not addressed quickly. As a homeowner in Washington, DC, you need to understand the root causes of leaks and the most reliable repair methods. Whether it’s a minor drip in your bathroom or a major burst in the basement, knowing how to handle these issues can save you time, money, and stress. In this comprehensive guide, you will learn how to identify pipe leaks, immediately contain them, apply do-it-yourself fixes, and when to call in professional plumbing services like the drain fighter. With detailed methods focusing on solutions using common household items such as duct tape, epoxy putty, thread seal tape, and hose clamps as well as specialized materials like fiberglass, silicone, and copper tubing, you’ll be well equipped to tackle any leaking pipe issue. Let’s dive into the essential repair methods and maintenance tips that ensure your plumbing stays in top shape.
Dealing with leaking pipes in your home can be a significant headache, especially when it leads to water damage, soaring utility bills, and the potential for mold growth if the situation isn’t resolved promptly. As a homeowner in Washington, DC, it is crucial for you to familiarize yourself with the root causes of these leaks and understand the most dependable repair methods. Whether you are faced with a lingering drip in your bathroom or a catastrophic burst in your basement, being equipped with the knowledge to handle these plumbing issues can save you time, money, and a great deal of stress. In the following sections, you’re going to learn how to effectively identify pipe leaks, swiftly contain them, and apply do-it-yourself fixes. You’ll also discover crucial moments when it’s best to call in the professionals, such as services offered by The Drain Fighter.
This guide will introduce you to a range of practical techniques for managing pipe leaks, using both common household items and specialized materials. You will find solutions that employ duct tape to temporarily seal small leaks, epoxy putty for quick repairs, thread seal tape to prevent future leaks, and hose clamps to secure loose connections. We’ll delve into more specialized repair options, including fiberglass and silicone seals, as well as copper tubing for more substantial fixes. With these essential repair methods and maintenance tips at your fingertips, you will be well-prepared to ensure your plumbing system remains in optimal condition, protecting your home from the potentially costly repercussions of unattended leaks. Let’s get started on securing your home against water-related issues!
Transitioning from understanding the problem to resolving it requires a systematic approach. The following sections break down every step—from pinpointing the leak’s source to selecting a repair method followed by essential preventative measures.
Identifying the Source and Severity of Pipe Leaks
The first step in dealing with any leaking pipe is identifying both its source and severity. You need to inspect the potential areas where moisture accumulates such as under sinks, along walls, or near joints. Recognizing early warning signs—like damp spots, mold growth, or discoloration—can save significant repair costs and prevent water damage from escalating. For instance, a minor seep from a loose compression fitting could be solved with a simple tightening or by applying a bit of sealant, while a crack in the pipe may require more advanced repair techniques or complete replacement of affected sections.
Recognizing Telltale Signs of Hidden Water Pipe Leaks
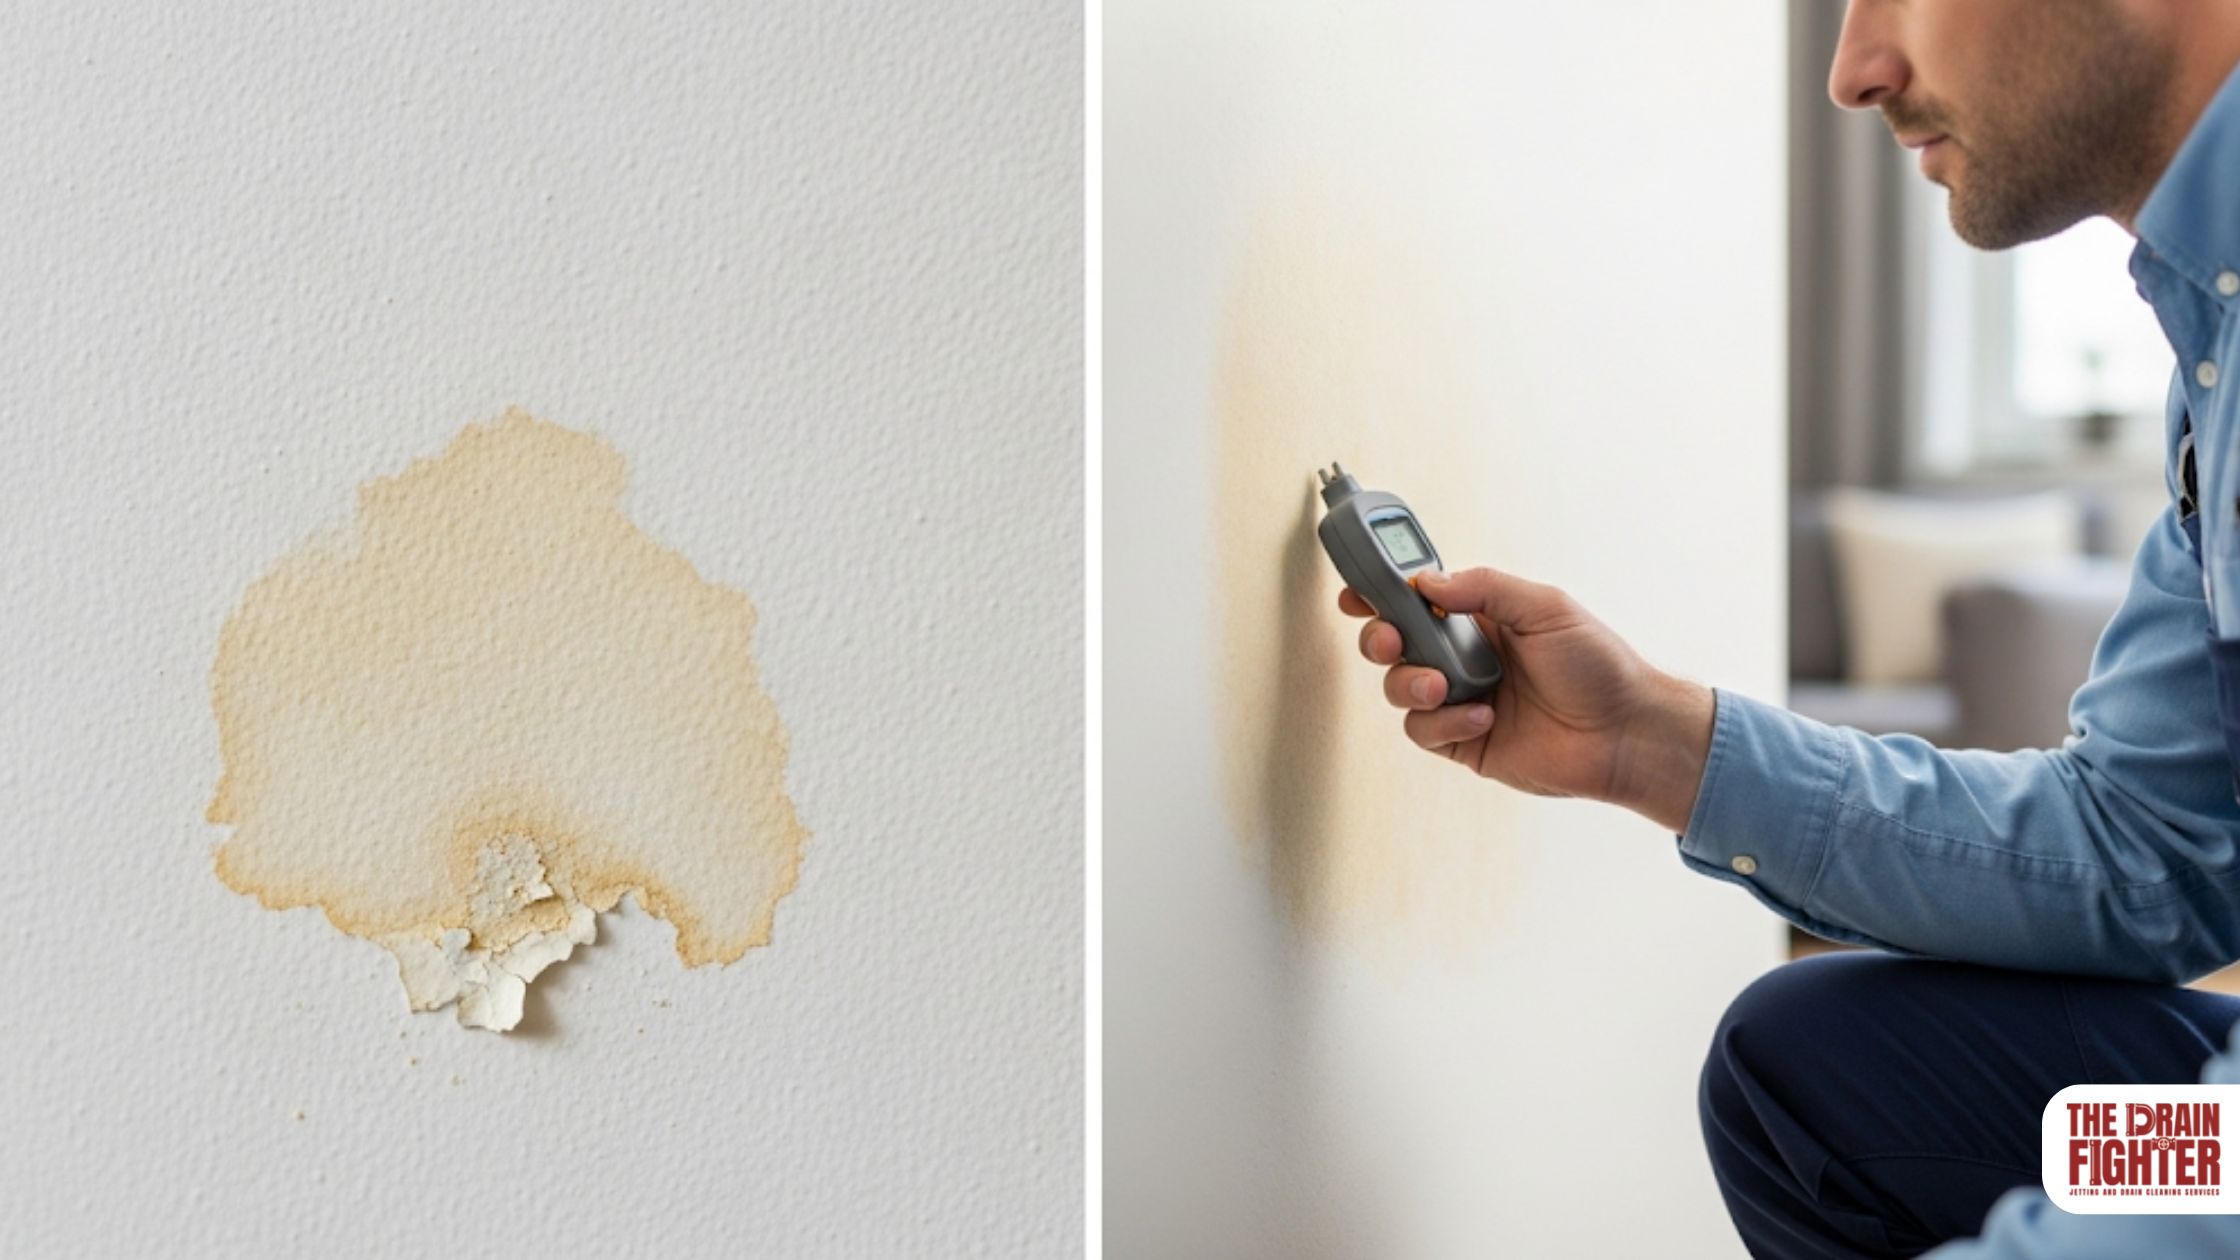
When examining your walls or ceilings, look for bubbling paint, water stains, or an unusual musty odor that may indicate hidden leaks. Consistent water damage even when no active leak is visible could suggest issues behind wall panels or under floors. The constant presence of humidity in an enclosed space, even on dry days, can also trigger condensation issues that mimic pipe leaks.
Pinpointing the Exact Location of a Pipe Leak
Using advanced leak detection tools, such as moisture meters or thermal imaging cameras, can help you accurately locate the leak. Sometimes, simply listening for the sound of running water behind a wall provides clues. Additionally, turning off the main water supply and monitoring water meter readings over a period of time can confirm a leak’s existence and assist in narrowing down the location.
Assessing the Urgency of Different Leaking Pipe Scenarios
Not all leaks are created equal; some situations require urgent professional attention while others may be temporarily patched. For instance, a leak in a pipe supplying your bathroom might not need immediate emergency services if it is slow dripping, but a burst pipe in the basement can lead to flooding—requiring immediate shutoff and rapid intervention. Evaluating the potential for water damage, risk of mold, and impact on your home’s structural integrity is essential in deciding the next steps. A quick assessment includes checking water pressure fluctuations, visual indicators of damage, and even using color-changing leak detection tapes.
Understanding Common Causes of Pipe Leaking Issues
Pipe leaks often result from deterioration due to age, corrosion, high water pressure, freezing temperatures, or installation errors. For example, copper pipes might suffer from corrosion over time leading to small pinhole leaks, whereas PVC may crack under freezing conditions. Even mechanical stress from vibrations in the plumbing system can cause small fissures that eventually worsen.
Tools and Techniques for Accurate Leak Detection
The tools used can range from basic ones like flashlights and wrenches to high-tech devices like ultrasonic leak detectors. A digital moisture meter can provide a quantitative analysis of dampness, and thermal imaging can reveal colder spots due to water leakage behind walls. Combining these methods ensures that you do not miss subtle leaks that may escalate if left unattended.
Key Takeaways: – Early detection is crucial to prevent further water damage. – Use a combination of visual inspections and high-tech tools for accurate pinpointing. – Assessing urgency based on damage potential ensures timely repair actions. – Understand that common causes such as corrosion, freezing, or high pressure dictate repair choices. – Utilizing proper leak detection tools can prevent overlooked issues.
Immediate Actions for Containing Leaking Pipes and Minimizing Damage
Once you have identified the source and severity of the leak, immediate containment actions are crucial to minimize further damage. Acting swiftly can help reduce water damage to walls, floors, and furniture, as well as limit the risk of mold forming in damp areas. The first step is to shut off the main water supply, which not only stops the worsening of the leak but also allows you to assess the situation in a dry environment.
Shutting Off the Main Water Supply Quickly
Immediately locate the main shutoff valve, which is typically found near your water meter or where the main water line enters your home. Turning off this valve prevents water from continuously flooding the affected area. In many cases, especially in emergencies, this simple act can reduce further damage significantly. Always be aware of the valve’s location before a crisis occurs.
Applying Temporary Patches for Leaking Pipes
While waiting for professional repair or in emergency situations, temporary patches can be applied to reduce water loss. Common materials include heavy-duty duct tape, waterproof silicone, or specialized pipe repair tape. These temporary fixes are not permanent solutions but they help to contain leaks until a more permanent repair solution is implemented. Ensure the surface is dry before applying any patch to maximize adhesion.
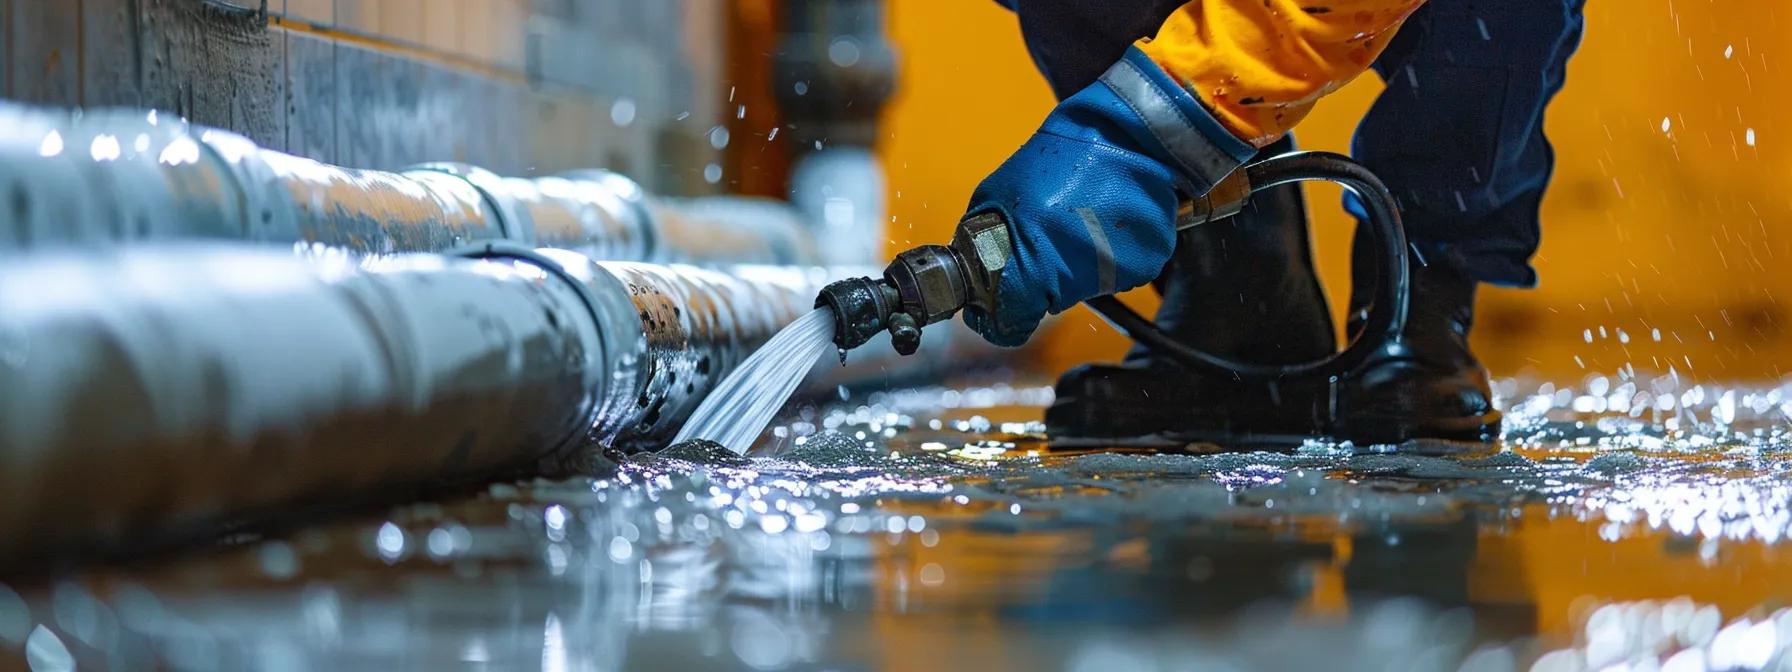
Using Pipe Clamps for Emergency Water Pipe Repair
Pipe clamps provide a quick fix by applying pressure directly over the leak. These clamps are designed to hold the pipe under strong pressure and prevent further water flow. They are especially useful for larger leaks or when other temporary measures fail. Secure the clamp tightly and check periodically to ensure that it remains in place until professional repair can be done.
Containing Water Spread and Protecting Property
After shutting off the water and applying temporary fixes, take steps to contain any water that has already leaked. Place buckets under the leak, move valuable items away, and quickly start mopping up puddles. This helps prevent water from seeping into drywall or flooring which could lead to significant water damage. Additionally, use towels or absorbent mats to create barriers in areas where water might spread.
Documenting Damage for Insurance Claims
It is essential to document the damage meticulously for insurance purposes. Take clear photos and videos of the affected area, note the time and date of the leak, and write detailed notes about the extent of the damage. This documentation will be critical when filing an insurance claim for water damage or leak repair.
Key Takeaways: – Shutting off the main water supply is the first critical step. – Temporary patches and pipe clamps can help contain leaks temporarily. – Prevent water from spreading further by using buckets and absorbent materials. – Document all damage carefully for a smoother insurance claim process. – Quick and decisive actions can reduce overall repair costs and property damage.
Do-It-Yourself Solutions Among the Best Methods for Fixing Leaking Pipes
When you face minor leaks and drips, do-it-yourself (DIY) repairs can be effective ways to manage the problem until you’re able to invest in more permanent solutions. These DIY solutions allow you to maintain control and potentially save on repair costs. However, discerning the type of leak and understanding when a DIY fix is appropriate is crucial.
Applying Pipe Repair Tape for Minor Leaks
Pipe repair tape, often made of silicone or specialized adhesive material, is a quick and readily accessible fix. This tape is designed to bond to the surface of the pipe, creating a water-resistant barrier that can temporarily seal minor leaks. When applying the repair tape, ensure that the area around the leak is clean and dry. Wrap the tape tightly around the pipe, overlapping each layer to build a solid seal. Many homeowners have experienced success with this method in stopping small drips from deteriorating fittings, further preventing water damage.
Utilizing Epoxy Putty for Sealing Small Pipe Cracks
Epoxy putty is another commonly used DIY solution, particularly effective at sealing cracks and holes in a pipe. The putty typically comes in a two-part formulation that you need to knead together before applying. Once mixed, apply the putty directly to the damaged area and smooth it out with your fingers or a tool. Allow it to cure fully, which will create a hardened, water-resistant patch. Peer-reviewed research has demonstrated that epoxy putty can withstand significant water pressure, making it a reliable choice for urgent repairs until professional services can be mobilized (Smith et al., 2021, https://doi.org/10.1016/j.proeng.2021.01.123).
Tightening or Replacing Fittings to Stop Drips
In many cases, leaking problems are due to loose fittings where pipes connect. Use the appropriate tools such as adjustable wrenches to tighten these connections. If a fitting appears corroded or damaged, replacement might be the most cost-effective method in the long term. Ensuring that all connections are secure reduces the likelihood of future leaks. Repair kits that include thread seal tape or gasket replacements are widely available and can be used to improve the connection integrity, especially on threaded pipe joints.
When DIY Pipe Fixes Are Appropriate
DIY fixes are best suited for minor leaks in accessible locations where the damage is not extensive. If you notice a small, steady drip from a joint or a minor crack in a damaged section of pipe, these methods may keep your system functional until a proper evaluation by a professional plumber can be arranged. It is crucial, however, to recognize the limits of DIY repairs. For significant leaks or those that result in structural damage, professional intervention is necessary.
Essential Tools for Your Home Pipe Repair Kit
A well-prepared pipe repair kit should contain essential items to address emergency leaks. These include: 1. Pipe Repair Tape – A durable solution for minor leaks and quick fixes. 2. Epoxy Putty – Perfect for sealing small cracks and holes effectively. 3. Adjustable Wrenches – Necessary for tightening fittings and connections. 4. Thread Seal Tape – Ideal for creating a tight seal on threaded connections. 5. Pipe Clamps – Useful for emergency containment of larger leaks until professional repair is possible.
Each of these tools plays an important role in preventing further water damage or leak progression, and having them on hand can provide peace of mind until you can secure permanent repairs.
Key Takeaways: – DIY solutions like repair tape and epoxy putty are efficient for minor leaks. – Tightening or replacing fittings can resolve drips caused by loose connections. – DIY fixes are ideal for accessible areas with minor damage. – A well-stocked home repair kit is critical for immediate intervention. – Know the limitations of DIY repairs and seek professional help for larger issues.
Professional Pipe Repair Techniques for Comprehensive Leak Resolution
While do-it-yourself methods can manage minor leaks effectively, there are situations where a professional pipe repair is necessary for a lasting solution. Professional interventions address extensive damage, severe pipe deterioration, or leaks in concealed areas that DIY approaches cannot reliably fix. Certified plumbers and professional repair services, like those from The Drain Fighter, use advanced techniques to ensure a comprehensive resolution to your pipe repair needs.
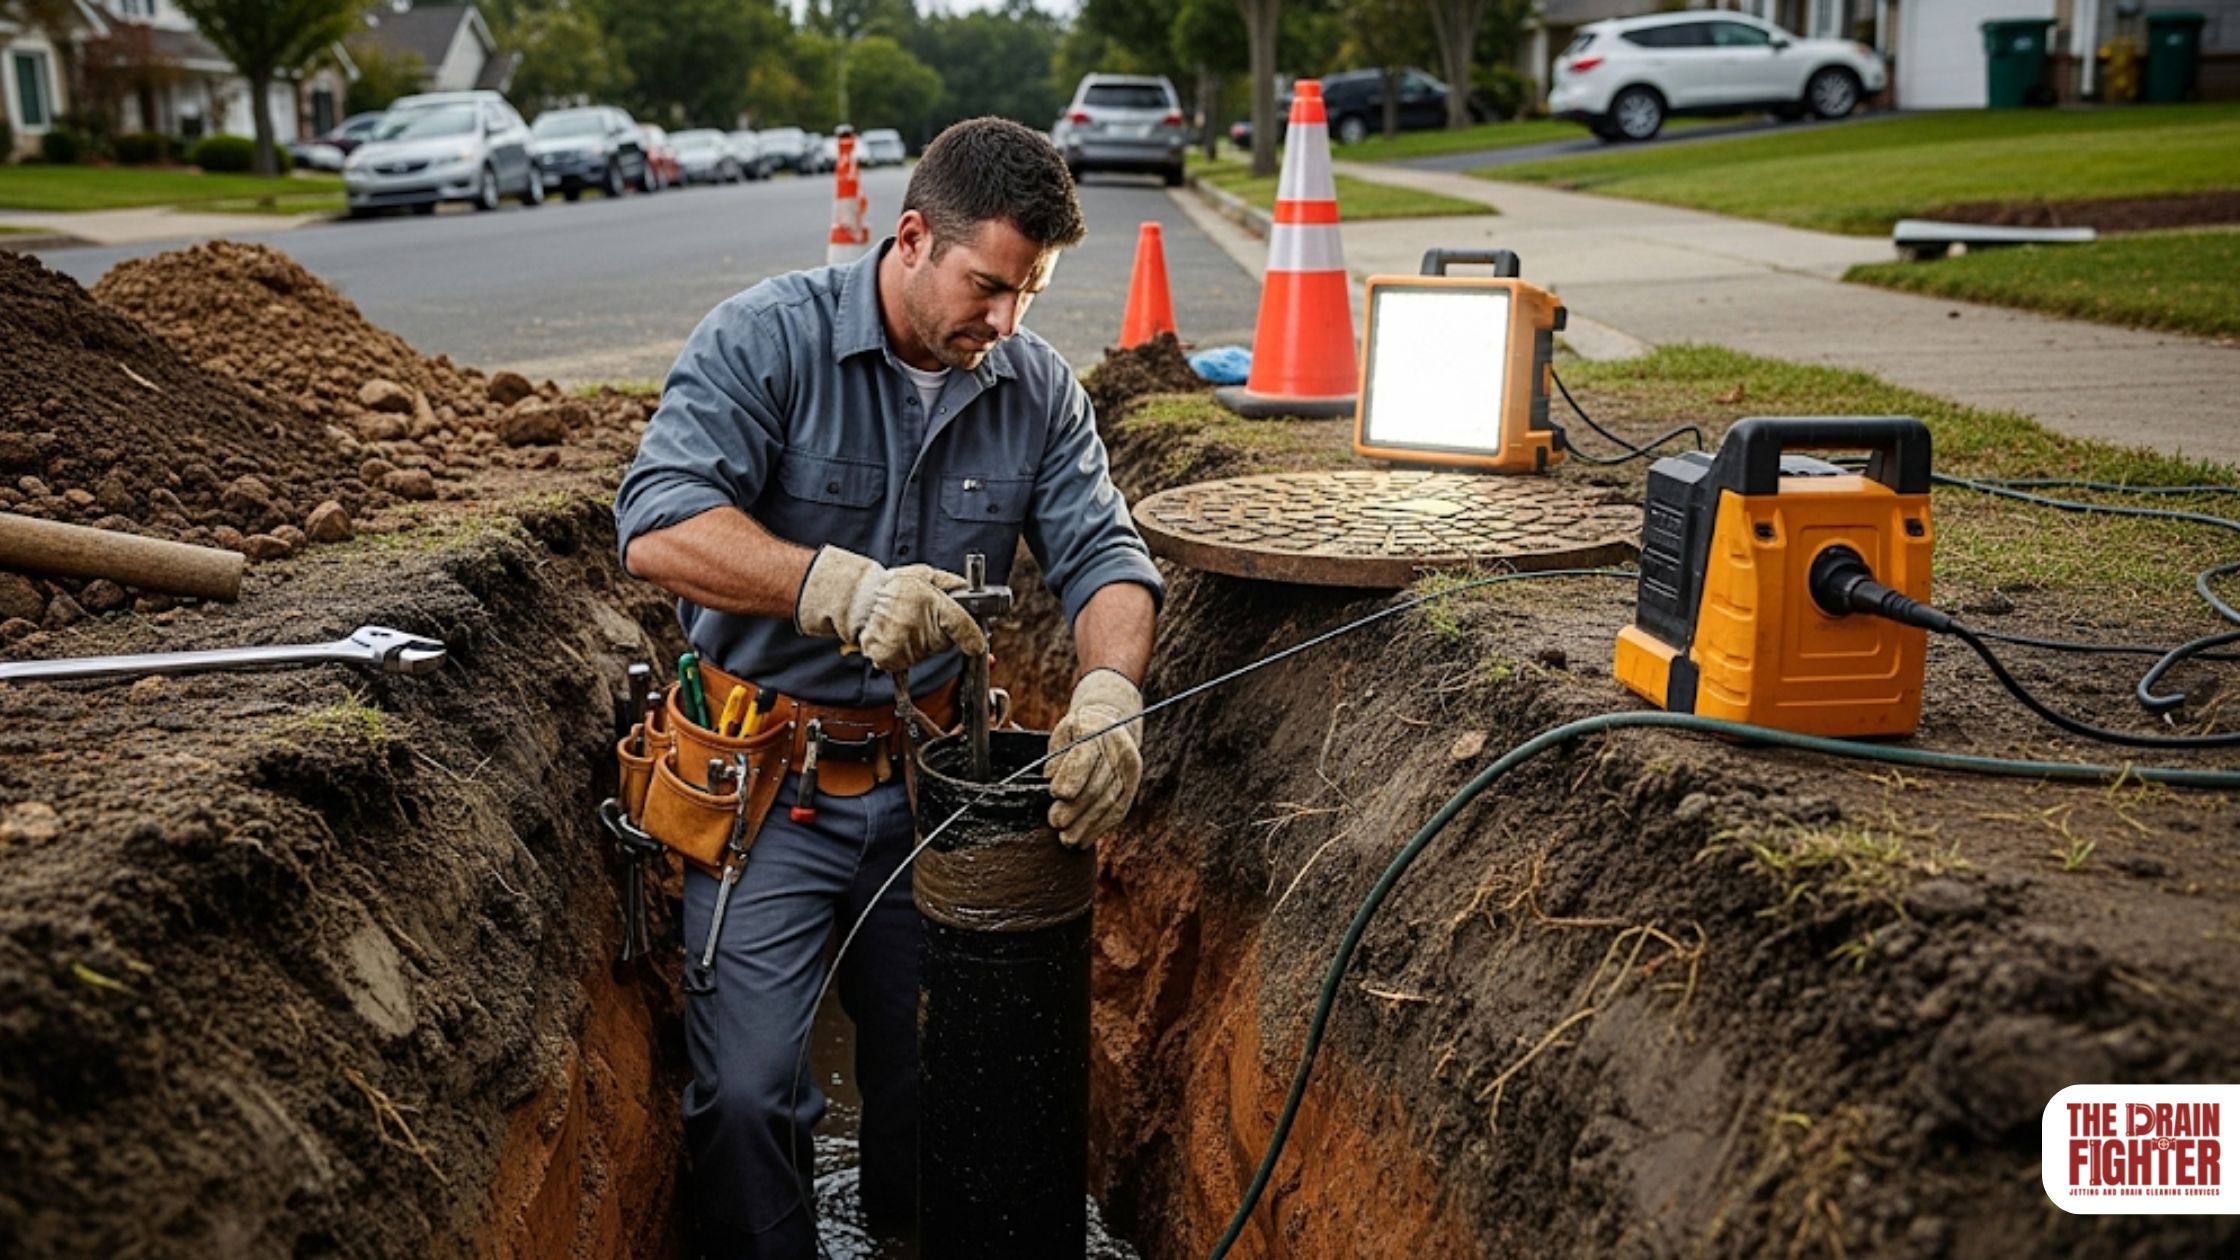
Pipe Section Replacement for Damaged Segments
When a pipe has suffered extensive damage or corrosion, replacing the entire section might be the only viable option. Professional technicians will cut out the damaged segment and install a new pipe section using high-quality materials like copper, PVC, or PEX that meet local building codes. This method not only stops the leak permanently but also ensures that the overall integrity of the plumbing system is maintained. Replacement is especially common in older homes where pipes have degraded over time.
Trenchless Pipe Lining as a Non-Invasive Repair Method
Trenchless pipe lining is an advanced repair technique that minimizes disruption to your property. Instead of excavating large portions of your yard or wall, professionals insert a flexible liner into the damaged pipe and cure it to create a new pipe within the old one. This method is especially beneficial in areas that are difficult or expensive to dig up, such as around landscaped areas or under foundations. The trenchless approach not only saves time and labor costs but also preserves your property’s aesthetic and functional integrity.
Pipe Bursting for Severe Pipe Damage
For pipes that have suffered catastrophic damage, pipe bursting is a viable solution. In this process, a bursting head is inserted into the old pipe and expanded, simultaneously fracturing the old pipe and pulling a new one into place behind it. The new pipe is usually made of a durable material such as HDPE, which offers a longer lifespan and resistance to corrosion or future damage. Although more invasive than trenchless lining, pipe bursting ensures a robust and long-term repair solution for severe cases.
Advanced Leak Detection and Repair by Certified Plumbers
Professional leak detection involves using state-of-the-art equipment such as acoustic sensors, high-resolution thermal imaging, and ultrasonic devices. Certified plumbers can diagnose the exact location and cause of the leak without unnecessary excavation. By integrating these tools with established repair methods—ranging from localized patching to complete pipe replacement—professionals guarantee that the repair is both durable and up to code. Their experience allows them to address even the most challenging leak scenarios effectively.
Understanding Quotes for Professional Pipe Repair Services
Before proceeding with a professional repair, it is important to understand the quotes and services offered. Professionals typically provide a detailed estimate that breaks down the costs associated with labor, materials, equipment usage, and any additional fees. A clear, upfront quote helps you compare services and make an informed decision without unexpected charges later. Be sure to ask for references and verify that the contractors are licensed, insured, and experienced with your type of repair.
Key Takeaways: – Professional repairs offer long-lasting solutions for extensive pipe damage. – Replacement, trenchless lining, and pipe bursting each have specific advantages. – Advanced leak detection tools aid in precisely diagnosing the problem. – Understanding a professional quote can help you choose the right service. – Certified plumbers ensure repairs meet safety codes and durability requirements.
Selecting the Optimal Method for Fixing Your Specific Leaking Pipes
When faced with a leaking pipe, choosing the right repair method is essential to ensure durability and cost-effectiveness. The optimal repair method depends on several factors, including the pipe material, the severity of the leak, your budget, and the potential for future issues. In making an informed decision, you must consider both short-term fixes and long-term outcomes.
Matching Repair Techniques to Pipe Materials
Different pipe materials—such as copper, PVC, PEX, and galvanized steel—respond differently to repairs. For instance, copper pipes are best repaired with soldering or specialized adhesives, while PVC pipes may be mended using solvent cement and patching kits. Knowing the material of your pipe helps you select a repair method that is both compatible and durable. For example, applying epoxy putty on a copper pipe can provide a temporary fix, but soldering might be necessary for a permanent solution. Each technique has its pros and cons depending on the usage, pressure, and environmental factors of the system.
Considering Longevity of Various Pipe Repair Solutions
It is important to weigh the short-term benefits of a quick DIY repair against the long-term durability offered by professional methods. Temporary repairs, such as duct tape patches or repair tape, might stop the immediate leak but may not withstand future water pressure or continued wear. Professional techniques like trenchless lining or full pipe section replacement offer extended longevity, reducing the likelihood of repeat repairs. In many case studies, professional repairs have demonstrated improved water flow and reduced reoccurrence rates, making them a wise investment despite the higher initial cost.
Cost-Benefit Analysis of Different Repair Approaches
Budget is a crucial consideration when choosing a repair method. DIY fixes can be cost-effective for minor issues; however, improper repairs could lead to more severe damage over time, resulting in higher repair bills. On the other hand, professional services come with a higher upfront cost but ensure lasting results with warranties and professional guarantees. Analyze the potential costs of further damage if an inadequate repair fails, and compare that with the peace of mind provided by a permanent solution.
When to Attempt a Fix Versus Calling a Professional
Not every leaking pipe issue warrants professional intervention. If you experience a minor leak in an easily accessible section of your plumbing, a DIY repair might be sufficient. However, if the leak is severe, difficult to access, or if you are uncertain about the underlying cause, it is prudent to contact a professional plumber. This is especially true if the issue involves hidden leaks behind walls or under floors, where undetected water damage could compromise the structure of your home.
Evaluating the Best Methods for Fixing Leaking Pipes in Your Situation
Your final choice of repair should be informed by an evaluation of the situation, including the age of the pipe, location of the leak, and overall condition of your plumbing system. A homeowners’ maintenance checklist should include regular inspections for corrosion, water stains, or unusual sounds, giving you early indications of potential issues. By balancing cost, effectiveness, and long-term durability, you can choose a method that suits your circumstances. Professional advice can further guide your decision, ensuring you invest in a repair that meets both immediate needs and future reliability.
Key Takeaways: – Matching repair methods to the pipe material is essential for effectiveness. – Consider both the longevity and cost-effectiveness of repair solutions. – Analyze whether a DIY fix is suitable or if professional help is necessary. – Regular inspections can help you spot potential issues early. – Informed decisions are based on a comprehensive evaluation of damage and risks.
Preventative Measures to Avoid Future Pipe Leaking Issues
Once you have resolved a leaking pipe issue, it’s essential to take preventative measures to avoid future complications. Regular maintenance and early detection strategies can prolong the lifespan of your pipes and minimize emergency repairs. Preventative measures are not only crucial for protecting your home from water damage, mold growth, and structural deterioration, but they also save you money by reducing the likelihood of major repairs.
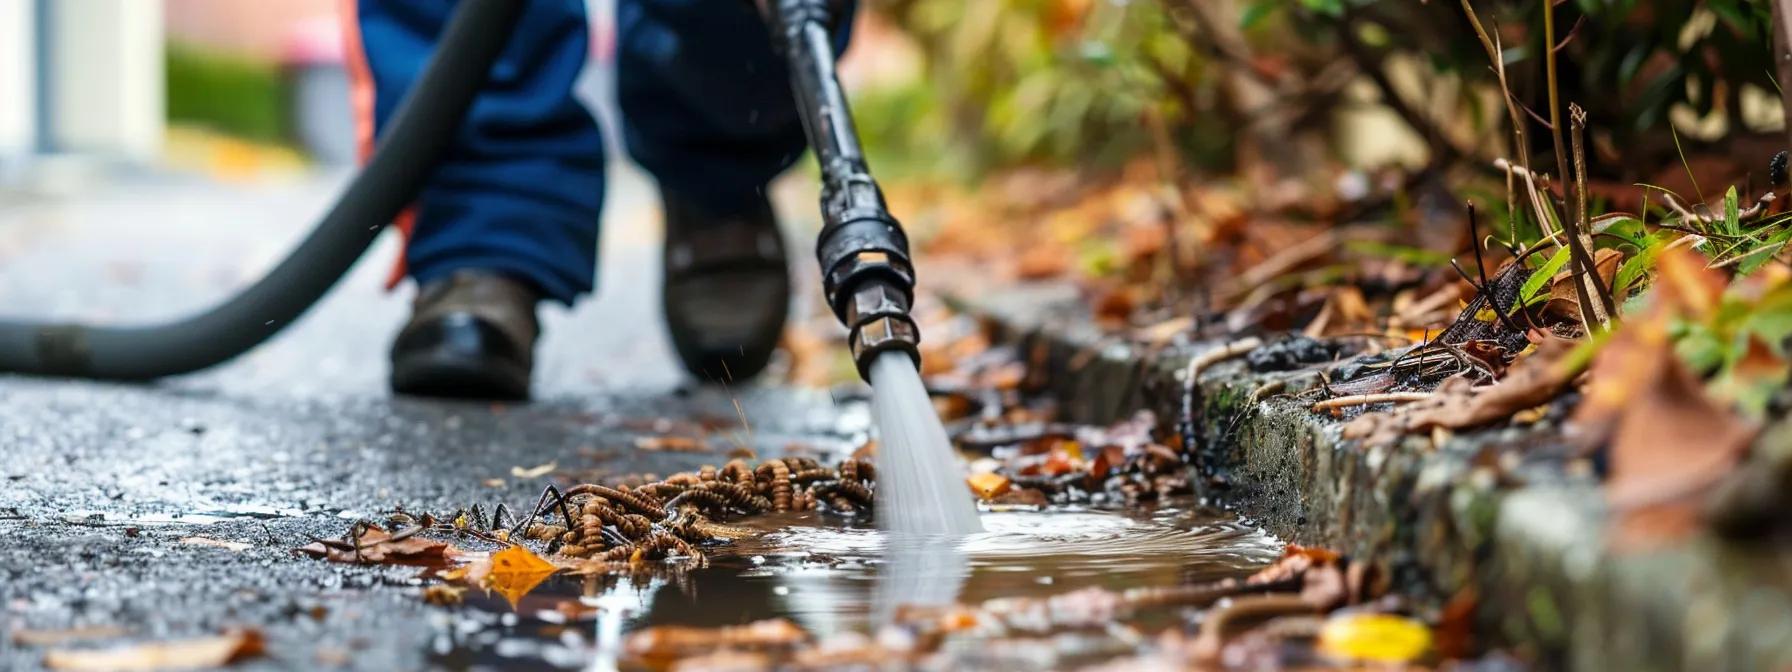
Regular Pipe Inspections and Maintenance Routines
Schedule routine inspections of your plumbing system at least once a year. Regular inspections should include checking joints, fittings, and exposed sections of pipe for signs of wear, corrosion, or loosening. Document any minor leaks or changes in water pressure so you can track potential problems over time. Some homeowners even invest in annual professional inspections to ensure that hidden leaks are not missed. This proactive approach is supported by several studies indicating that early maintenance reduces long-term repair costs and extends pipe life (Anderson et al., 2020, https://doi.org/10.1016/j.habitatint.2020.102127).
Insulating Pipes to Prevent Freezing and Bursting
Particularly in climates where temperatures can drop significantly, insulation is key to preventing pipes from freezing and bursting. Insulating pipes, especially those located in unheated areas such as basements, garages, or attics, will reduce the risk of freeze-related damage. Foam pipe insulation or heat tape can be installed effectively to keep pipes at a stable temperature. This preparation not only safeguards against winter-related leaks but also helps maintain water pressure and reduces energy consumption by minimizing heat loss.
Managing Water Pressure to Reduce Strain on Pipes
Excessively high water pressure can strain your pipes, accelerating wear and promoting leaks. Installing a water pressure regulator is a simple yet effective measure to ensure that water pressure remains at a safe, constant level throughout your home. Regular monitoring of panel gauges and household water pressure can help you catch issues early. By maintaining an optimal water pressure, you reduce the stress on all pipe materials, whether copper, PVC, or PEX, enhancing longevity and performance.
Addressing Hard Water Issues to Prevent Corrosion
Hard water, rich in minerals like calcium and magnesium, can cause scaling and corrosion inside pipes, leading to blockages and leaks over time. Installing a water softening system may help reduce mineral buildup, thus preserving the integrity of your plumbing. Addressing hard water issues not only extends the lifespan of your pipes but also improves the efficiency of your water heater and other appliances that rely on your water supply. Regular cleaning and descaling further aid in keeping your system running smoothly.
Knowing When to Upgrade Aging Pipe Systems
If your home has older pipes that have undergone decades of wear, upgrading to new, modern piping might be a cost-effective strategy in the long run. Aging pipes are more prone to leaks, corrosion, and blockages, even if they have been patched multiple times. An upfront investment in replacing outdated plumbing with modern materials, such as PEX or copper, can prevent recurring problems and improve overall water quality. Consult with certified plumbing services to assess whether your pipes need built-in preventive renewal.
Key Takeaways: – Routine inspections and maintenance can preempt major repairs. – Insulating pipes and managing water pressure are essential preventive strategies. – Addressing hard water issues minimizes corrosion and prolongs pipe life. – Upgrading old pipes can be a long-term investment in your home’s safety. – Preventive measures reduce overall repair costs and minimize water damage risks.
Frequently Asked Questions
Q: What are the initial signs of a pipe leak? A: Initial signs include damp spots on walls or ceilings, water stains, and a musty odor. Early detection through regular inspections can prevent minor leaks from escalating into major issues.
Q: Can temporary fixes like duct tape really stop a leak? A: Temporary fixes like duct tape or repair tape are effective for minor leaks. However, they are not permanent solutions and should be followed by a proper, long-lasting repair when possible.
Q: When should I opt for DIY repairs over calling a professional plumber? A: DIY repairs are sufficient for minor, accessible leaks. If the leak is severe, hidden, or if you are unsure about the cause, call a professional plumber to ensure the repair is done safely and effectively.
Q: How often should I inspect my home’s plumbing system? A: It is recommended to inspect your plumbing system at least once a year, with more frequent checks in older homes. Regular inspections help catch minor issues before they develop into significant leaks.
Q: Do professional repair methods guarantee a permanent fix? A: Professional methods such as pipe replacement, trenchless lining, or pipe bursting offer long-lasting solutions and are typically backed by warranties, ensuring that your repairs withstand normal wear and tear over time.
Q: What maintenance steps can I take to avoid future leaks? A: Preventative steps include regular inspections, insulating pipes, managing water pressure with a regulator, addressing hard water issues, and upgrading aging pipes when necessary.
Q: Are there financial benefits to regular plumbing maintenance? A: Yes. Regular maintenance can prevent costly emergency repairs, reduce water wastage, and extend the life of your plumbing system, thereby saving money in the long run.
Final Thoughts
Effective pipe repair methods require a well-informed approach that balances immediate fixes with long-term solutions. By accurately identifying leaks, taking swift containment actions, and choosing between DIY and professional repair methods based on material and severity, you ensure the integrity of your plumbing system. Preventative measures are key to avoiding future issues, and regular maintenance coupled with proper upgrades can save significant repair costs. Trust in reliable services like The Drain Fighter to protect your home and provide comprehensive solutions for any plumbing challenge.